Get in touch
fiste1ja@gmail.com
Do you have an idea for a video or article? Or is there something you'd like to see in the store?
Let me know!
Share

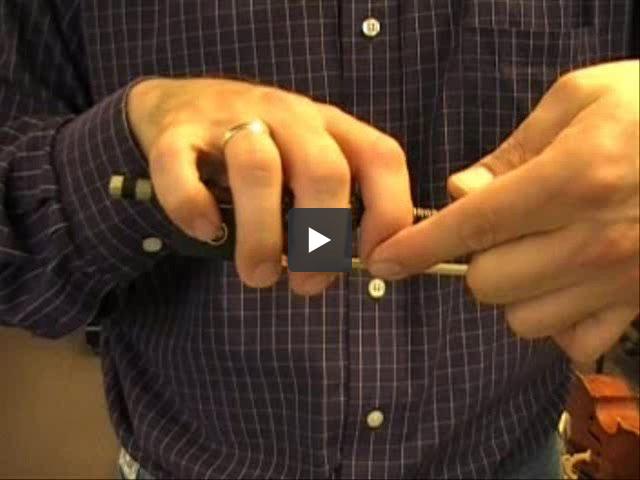
Relaxed Bow Hold on the Cello
By Jamie Fiste, Professor of Cello at Central Michigan University
Share This
A loose, relaxed bow technique is vital to executing advanced bow techniques on the cello. There are many exercises that are designed to teach loose fingers on the cello. Often, however, these exercises only teach active motions in the fingers. Equally important is practicing passive finger motions in the bow hand. That is what this video is about; learning how to allow your fingers to move passively
in the right hand.
But before I go any further, this article addresses more advanced bow technique. If you are looking for something more basic, please see my article and video on the beginning bow hold,
Before tackling passive finger motions, I prefer to begin with the larger motions in the bow arm, followed by passive wrist motions
and loose fingers. I recommend watching these videos and reading the accompanying articles before delving into the technique of loose fingers.
Advantages of Loose Fingers
Passive finger motions in the bow hand help with many aspects of cello playing such as;
- Legato (smooth) bow changes
- Sautillé, or fast spicatto
- Staccato
- Portato
- Less active motions (more efficient playing)
- Less tension in general
The Legato Bow Change
The primary application of the relaxed bow hold that the video focuses on is the legato or smooth bow change. In order to execute a legato bow stroke, a quick release of weight precisely at the moment of the bow change must happen. This allows the string to continue some of its vibration without making a complete stop and start. Having loose fingers allows this to happen nearly automatically.
So what is involved technically in this type of motion?
The Pivot in the Bow Hand
The pivot is the necessary starting point for the legato bow stroke. It is difficult to overemphasize the importance and usefulness of the pivot in the bow hand. The pivot allows for a pronating and supinating movement in the forearm and hand.
As a general principle, it is best to avoid a bow hold that is locked into one position, absent of any movement whatsoever. The right type of motion is the antidote to tension. Tension prefers immobility, not motion. Tension locks us up while motion frees up. One of the motions in the bow hand that can help release tension is the pivot.
The pivot can occur between the thumb and second finger or between the thumb and first and second fingers acting as a pair. So step number one is to work on this pivot in the bow hand with the exercises provided in the video (it's virtually impossible to describe adequately in words). This pivot motion can be taught early to beginning students to prepare them for the many bow strokes that utilize it.
Pivoting and Finger Motion
The challenge is to employ the pivot motion in the bow hand while maintaining control of the bow. The key is to allow the fingers to bend and lengthen during the pivoting.
During an up bow, the hand will pivot to a more pronated position. The fingers in the back of the hand will need to lengthen to continue to reach and the first finger will bend some.
During the down bow the opposite happens. The hand will pivot to a more supinated position, the first finger will lengthen, and the third and fourth fingers will need to bend. It is important to prevent the first finger from fully straightening; be sure to keep a slight curve, especially in the last digit of the finger.
Pivoting as a Response to the Resistance of the Strings
As you play closer to the bridge, the strings will resist vibration from the bow more than near the fingerboard. It feels a bit like spreading peanut butter on bread or moving through molasses. If the hand is relaxed enough, a pivot to a more pronated position during an up bow and supinated position on the down bow will happen naturally.
It needs to be kept in mind that the amount of pronation and supination in the hand and forearm is related to the amount of resistance from the string. As a result, less pivot will happen near the fingerboard than near the bridge and therefore less finger motion as well.
As an exercise, I like to play separate bows near the frog at the fingerboard, gradually moving towards the bridge while continuing the separate bows. As I move towards the bridge, I allow more pivoting in the hand with greater finger motion.
Keeping the Fingers in Place
As the pivoting happens with the fingers bending and lengthening, it is important to not let the fingers slip or lose their position. I prefer to feel the contact between the finger pads of the third and fourth fingers and the frog of the bow. The pads allow for movement yet 'give' a little; they are kind of like jello or a gel seat.
To feel your jello pads on your fingers, try placing your second, third, and fourth pads on a table top and just wiggle your hand and feel how they still maintain their place while your hand moves around. It's a different type of movement in the hand than what we are discussing here but it gives you an idea and feel for how the pads can be used to maintain your contact with the bow during hand motion.
Every Finger Pivots
Although we began with the pivot between the second finger/thumb or thumb/second and third fingers, each finger pivots on the bow.
Although this may sound a bit 'gross', I think of an invisible pin through the first finger between the first two knuckles (starting from the end or tip of the finger) into the stick. The first finger pivots around this pin (it's a special pin that doesn't hurt!).
The other fingers pivot on their pads and the thumb pivots where it makes contact with the stick (see the video on the beginner bow hold
to know where the thumb makes contact with the stick).
This is all a bit difficult to explain without any demonstration so I recommend watching the video embedded on this page!
I hope this gives you something to think about and happy practicing!
Authored by Jamie Fiste, Professor of Cello at Central Michigan University.